How to Automate a Minmus Landing

Watch on YouTube: https://youtu.be/q7GDV539nnc

I don’t want to start off on the wrong foot and say automating a munar landing was easy, so let me say this instead. I was not prepared for the level of difficulty presented by Minmus. To be clear, the Mun landing required more than 25 attempts to achieve a 50% success rate, and that felt like a near miracle. With Mun, the goal was simpler. Its orbit around Kerbin is aligned with the ecliptic. This was a design decision made by the game designers to make it easier for players to make meaningful progress in the game. I’m glad they did because the game is arguably one of the most difficult on the market. The script suffers the same penalties experienced by new players. Things can go sideways quickly.

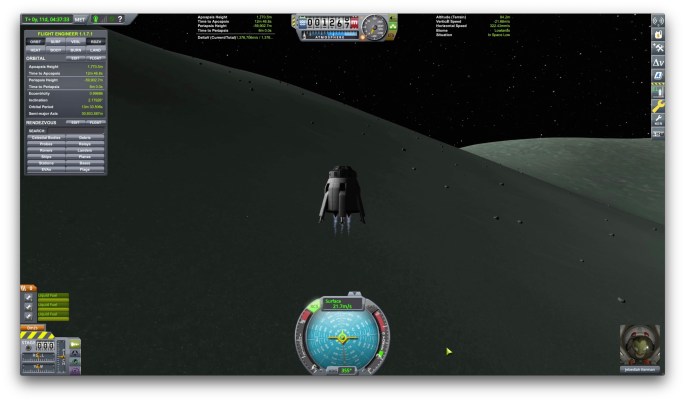
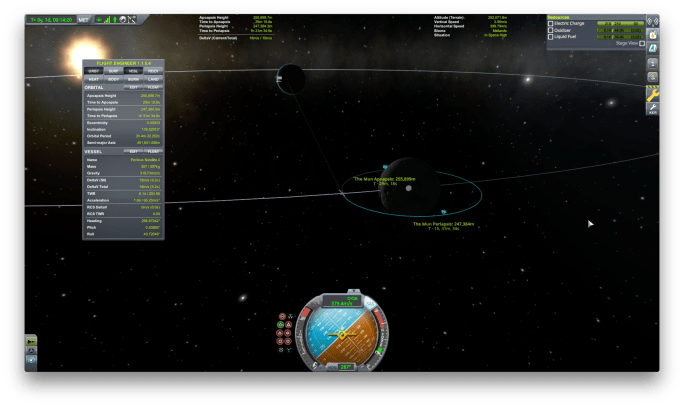
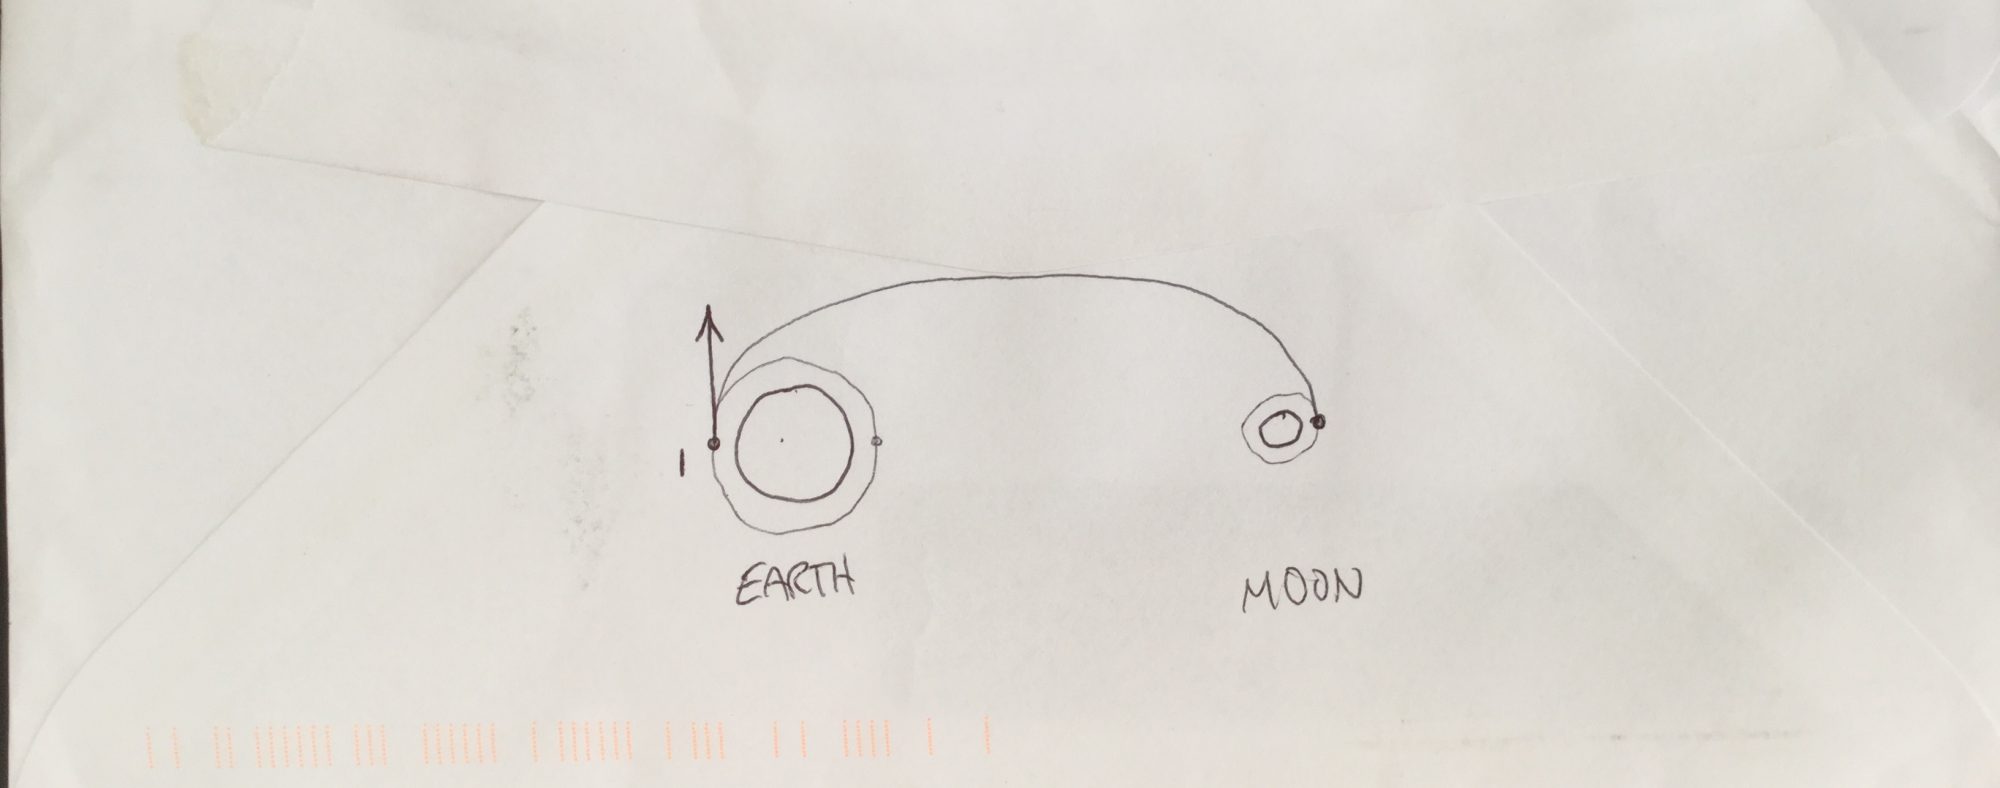
To review, the munar automation script stabilizes into low Kerbin orbit at 80km before computing a transfer orbit maneuver with a predetermined prograde delta-v. Then, after executing the maneuver, it settles into an elliptical orbit with a low periapsis before circularizing at 20km munar altitude. Finally, deorbit and hoverslam to land on the surface. Simple, right? Again, no.

Turns out you can’t simply adjust the prograde delta-v and let the script figure things out. After about ten attempts doing exactly that, I realized there were some significant barriers. For one, the Mun is in the way sometimes, and the script takes a looooooong time to find a solution. Also, it became clear there was a lot of room for improvement in my approach to throttle control. At this point, the results were not good. In the rare cases when I was able to chart an intercept course, the maneuver execution was … imprecise … and I ended up on an escape trajectory.

This makes sense, if you think about it. There’s a lag between the moment we detect some condition is satisfied and the moment the engines stop producing thrust. Chalk it up to a symptom of an engine with high thrust and high specific impulse. We overshoot every time, as a direct result of this delay. We can use simple solutions attempting to compensate, like decreasing throttle by 75% when we approach the engine cutoff condition. This only really reduces the magnitude of the observed effect and does very little to contribute to a more robust solution.

Our best approach is to rethink the control strategy entirely. The first time, it was simply a matter of activating engines at full throttle, deactivating when a condition is met. To achieve a more nuanced result, we will need to take into consideration how far away we are from achieving the condition. In mathematical terms, this means using a ramp input instead of a step input. A ramp input is more like slowing down gradually before stopping, whereas a step input is like slamming on the brakes at the last moment.

Let’s start by incorporating a proportional controller. Rather than providing a constant step input to the throttle, we reduce the throttle based on the remaining delta-v required for the maneuver. This allows us to go full throttle at the beginning, when there’s a large gap to traverse, and then reduce throttle as we approach the target. This gives us the ability to exercise fine control at the end of the maneuver when precision is most important.

Using this proportional control technique, the script is able to stabilize on an intercept orbit with Minmus. However, even with our precise throttle control, we still experience strange oscillations around the target in some cases. In one case, this was caused by a less-than where I needed a less-than-or-equal-to. In most cases, though, it was because the conditions were error-prone.

One key error I encountered was assumptions about the precision of the time warp tool. I incorrectly assumed the ETA for orbital transition would be accurate within a second. Sadly, it is not. This means sometimes the warp completes before the vessel enters the Minmus orbital patch. This has catastrophic effects on the automation process, as it picks the planet periapsis ETA instead of the Minmus periapsis, which is highly correlated with my cursing at the game. After sorting out this subtle nuance in the logic, the rest fell into place. Ok, so what does the code look like?

As with the Mun landing script, we use a runmode variable to manage each phase of the mission. We’ll start from orbit this time, to focus on the differences presented by a Minmus transfer orbit. Let’s dive in!

The main difference between Minmus and Mun orbits is the inclination. Minmus is inclined about 6 degrees from the ecliptic plane. Without adjusting the inclination, we may need to wait considerably longer to plot a transfer orbit, as Minmus shifts in and out of plane relative to Kerbin. Also, Mun intermittently interferes, making it more important to match the inclination.

As a result, our first maneuver after achieving stable orbit is to compute an inclination maneuver. We do this by creating a node with a starting delta-v in the normal direction. We move the node forward in time, comparing the inclination of the resulting orbit against the previous value until we detect an inflection point. Then, we adjust the delta-v until the resulting relative inclination approaches zero.

Once we have our maneuver planned, we simply time warp to the maneuver and execute the burn. Here, we use a proportional controller based on the ship’s scalar speed and the maneuver delta-v requirement. The limit condition is defined based on a simple threshold. We cut the throttle when the relative inclination approaches zero. Then, we proceed to the next runmode to compute the elliptical transfer orbit.

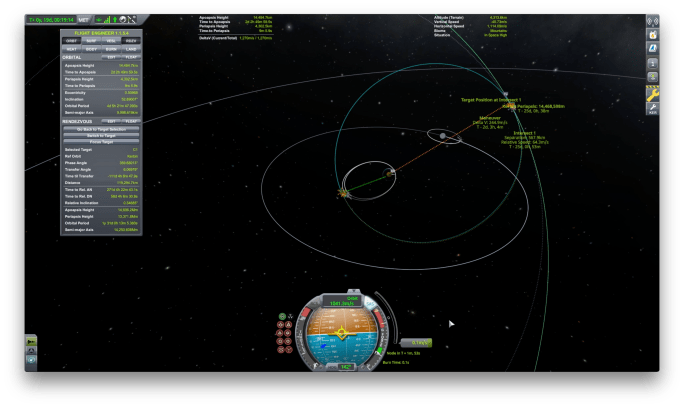
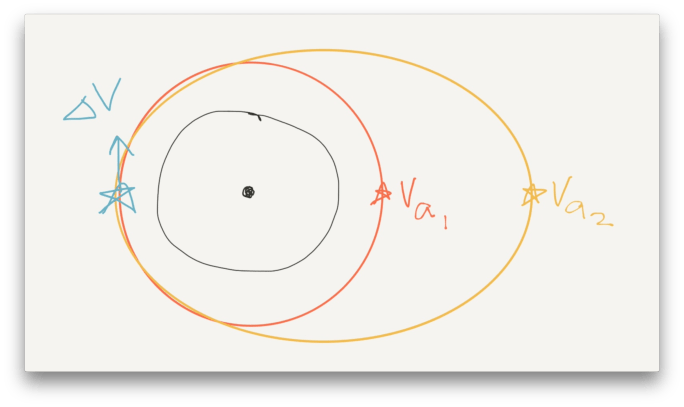
This phase uses the same iterative technique with constant prograde delta-v to find a maneuver node time with a Minmus intercept. Once we have a valid transfer orbit planned, we time warp to the maneuver and execute another burn. Again, we use a proportional controller based on speed and delta-v requirement. Again we use a limit condition.

Early versions of the logic simply added the appropriate delta-v and hoped for the best. This often left the vehicle on an elliptical orbit, but not necessarily on a Minmus intercept. This is because of the extended burn time introduced by the proportional controller. Maneuver nodes assume instantaneous impulse, and there’s no way to add so much energy so fast without squishing the meatbags.

A better way to achieve our stable intercept is to use a different condition entirely. Rather than wait for a specific delta-v change, we cut the engines immediately upon detecting a Minmus intercept. This helps to guarantee an intercept, but it’s worth noting this is not an efficient algorithm. It simply results in a well understood landing sequence, where we can re-use the components from our Mun landing script. We use different values for the altitudes, but otherwise the rules are the same. At this point, we have achieved our most significant milestone in the process. Time to enjoy the fruit of our labor.

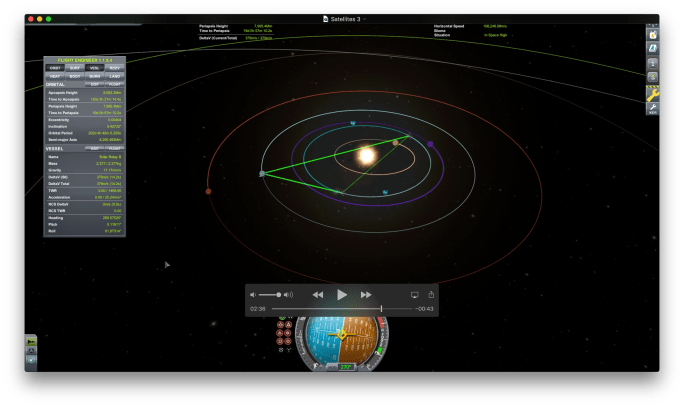
While we watch the best attempt, let’s reflect again on the difficulty of this challenge. For the Mun landing, it took 25 attempts. This time, it took more than twice as many attempts. In total, this video required 64 attempts to reach the same success rate criteria. It seems only fitting to show all the attempts as one magnificent composite. So, sit back and relax. Enjoy this time lapse of all the attempts at the same time.

Mining Part 2, Mining Colony

Vimeo: https://vimeo.com/324381843

YouTube: https://youtu.be/1MprhkvcIaw

Welcome to Kerbalism! I’m your host, Aubrey Goodman. In this episode, we upgrade a manned surface station into a mining colony.

In our last episode, we landed a construction core on Minmus, ready to expand itself to support higher volume resource processing. Now, it’s time to grow our station into our first mining colony. We need a manned presence to enable ongoing mining operations, extracting resources from the surface.

With asteroids, there is a much smaller opportunity for resources. If the asteroid is only one thousand tons, we spend a lot of energy and time with finite benefit, equal to the mass of the asteroid. We must repeat this for each asteroid we wish to harvest. If the asteroids are small, we may use more resources capturing them than they yield from processing.

Moons are different. Resource abundance on the moon surface is effectively limitless, compared to the cache in the asteroid. Once we’re settled in at a good location, we can produce an arbitrary amount of fuel and send it back to orbit. We’ve chosen Minmus because its surface-to-orbit delta-v is very small. The cost of sending resources from the surface to orbit is much lower than Mun or Kerbin. From the surface of Minmus, we can launch into low planetary orbit for about one third the cost of launching from the planet directly.

The construction core is designed for expansion. The goal is to land the bare minimum mining gear and use it to build the rest on-site. Our station core has both radial and vertical expansion options. After we add processing components, we expand outward with more support struts with the same radial and vertical options. These become new expansion points and we repeat as needed.

Of course, expansion comes with its own challenges. Our first expansion of processing equipment was lost when it overheated and exploded. Fortunately, no other nearby parts were damaged. The expansion plan must include increased solar and thermal management. We also need to leave room for ships to land for refueling. These vessels will not be docking in the traditional sense. They simply land near the station and connect via fuel hose. The hoses are limited in length, so ships will need to land close to the hub and wait for colony crew to attach the hose before fuel transfer can begin. Once attached, the station can transfer stored fuel or make new fuel on-demand, until the ship’s reserves are full. Then, it’s simply a matter of detaching the fuel hose and blasting off to Minmus orbit to rendezvous with an orbital fuel station.

Using this technique, we can deliver fuel within our planetary system to support the needs of any ships traveling between the planet and its moons. As we expand to other planets, we create new mining colonies on moons as needed.

As always, thanks for watching Kerbalism!

Asteroids Part 2, Capture and Harvest

Vimeo: https://vimeo.com/311723008

YouTube: https://youtu.be/628eqhhpV5s

Welcome to Kerbalism! I’m your host, Aubrey Goodman. In this episode, we harvest resources from an asteroid and use them to capture the asteroid in orbit.

In our last episode, we intercepted an asteroid and grabbed onto it. We still need to slow it down in order to capture it into planetary orbit. If we don’t slow down, our harvester will be swept out of the planet’s sphere of influence to solar orbit along with the asteroid. Since the whole point is to use the resources within the asteroid, we need a retrograde burn with the asteroid in tow.

We’ve used most of the fuel to position our harvester. If we’re lucky, we might have some fuel to slow down, but there’s a good chance we’ll need to do a little harvesting before we can perform the maneuver.

This is where we begin to encounter the boundaries of what KSP can do. As sophisticated as it is, the unmodified game supports only one form of resource processing – fuel. We can convert ore into various fuels, but we can’t make metal or rocket parts to build directly in space. There are addons to enable this, and we’ll use them in the next episode.

This is also where we surpass the real world capability. The game allows players to grapple an asteroid and extend drills, all with the click of a button. Clearly, we don’t yet have this level of technology available in the real world.

The reason we use a harvester to capture our asteroid is simple. It would be expensive to bring enough fuel to slow down the asteroid, so we bring harvesting equipment along and use it to make fuel after we arrive. By carrying fuel processing components, we can plan to use most of our fuel to intercept and attach to the asteroid. Then, we can mine resources and process them into fuel to fill our tanks before the return trip.

With adequate fuel in our tanks, we perform a retrograde maneuver to settle into stable planetary orbit. The final altitude of our asteroid’s orbit will affect our orbital fuel harvesting operations, so it’s important to consider the details.

If the asteroid inclination is high, we will need extra fuel to ferry ore between the harvester and the processing facility. However, the asteroid itself is massive, so we would need a lot of fuel to move it to a different orbit. In our example, we settle into a circular orbit around the planet, between our two moons, but in a highly inclined orbit.

With an asteroid in stable orbit around the planet, we can begin to use its resources. In our next episode, we refine these resources into metal and rocket parts to build spacecraft directly in orbit. Don’t miss it!

And thanks for watching Kerbalism!

Asteroid Part 1, Intercept and Rendezvous

Vimeo: https://vimeo.com/309555177

YouTube: https://youtu.be/0g4-8K4fRVg

Welcome to Kerbalism! I’m your host, Aubrey Goodman. In this episode, we intercept and rendezvous with an asteroid.

As we expand to build stations on other planets in the system, we need to evolve our concept of manufacturing. Instead of building everything on Kerbin and launching to orbit, it makes more sense to build an orbital construction facility and use resources collected from asteroids to build new craft directly in orbit.

Before we can do anything with an asteroid, we need to identify and classify nearby objects worthy of our attention. This is the first part of a sequence of tasks we must undertake in order to collect materials from an asteroid and refine them. A tiny asteroid may have only 15 tons of usable resource material. While it may sound like a lot to the uninitiated, this would yield barely enough fuel to a few maneuvers.

In order to find high value targets, we need a solar satellite with an infrared scanner. With this equipment, we can identify and begin to evaluate possible targets. This new satellite is smaller than our solar relay. It uses less fuel to deploy. We will eventually need more than one, so we can identify asteroids at different distances from the star.

Using our infrared scanner, we begin to identify nearby asteroids. In KSP, there are alerts notifying the player about newly discovered objects. We need to find one on an intercept course with Kerbin. This makes it easier to get to the asteroid. Objects further away or not already on an intercept course will require more fuel and more advanced planning to capture into orbit. The asteroid itself is traveling faster than the planet, so it will not settle into orbit around the planet on its own. We must grab it and slow it down to stabilize in orbit.

In this example, we’ve settled on a target asteroid about 50 tons in mass. Its existing intercept orbit will bring it within 39 thousand kilometers of the planet. This means we need about the same delta-v as a trip to Minmus. Again, we would need much more to intercept with a free asteroid on a solar orbit.

Just as we saw with orbital stations, asteroid harvesters must also be assembled in orbit over several phases. For the purposes of this episode, we will build it on Kerbin and send it into orbit empty. Then, we send support missions to deliver fuel to the harvester in orbit. It would be prohibitively expensive to send the fully fueled harvester into orbit. All that fuel weighs a lot, requiring more powerful engines, which weigh even more. By reducing the payload mass by delivering components in parts, we can dramatically reduce the first stage fuel requirements.

Once we have the harvester fueled up and ready to go, we can proceed with the rendezvous. We do this in four maneuvers.

First, we need to align the harvester’s orbital plane with the asteroid. For highly inclined orbits, this may use a lot of fuel. One of the benefits of being in low planetary orbit is easy access to refuel missions. If you use a lot of fuel changing the inclination, you can top up the tanks before the long trip out to the rendezvous point.

Second, we need a prograde burn to raise the harvester’s apoapsis to match the asteroid’s periapsis. In other words, we raise the high point of the harvester orbit until it meets the low point of the the asteroid orbit.

Third, we need another prograde burn to bring the harvester periapsis up to a point where the two craft come within 50km of each other near the rendezvous point. This is a precision maneuver and requires a bit of finesse to pull it off.

Finally, we burn in the direction of the target to close the gap, ultimately locking onto the asteroid with the grappler. After we have our asteroid locked, we point the solar panels toward the star. Then we can start drilling!

Intercepting an asteroid requires a lot of delta-v. There’s a good chance we used up most of our fuel in the intercept process. Now it’s time to get ready for our next episode, capturing the asteroid down to planetary orbit. We will need to collect ore and process it into more fuel to slow down the asteroid. Stay tuned!

And thanks for watching Kerbalism!

Stations Part 3, Nearby Planets

Vimeo: https://vimeo.com/310704564

YouTube: https://youtu.be/V6dT4-zPk8c

Welcome to Kerbalism! I’m your host, Aubrey Goodman. In this episode, we send a manned station to Duna.

After we have built sufficient infrastructure, we’re ready to take a bold step. It’s time to send a manned mission to orbit around another planet in our solar system. In the real world, we would be going to Mars. For the purposes of our discussion, we’ll go to Duna, which is a lot like Mars.

Just as before, we will construct our station in planetary orbit before sending it on its way. This time, though, we need to use completely different designs for the support craft we’ll be taking with us. The science and tourism landers designed in the last episode were meant for landings on moons.

Duna has significantly more mass than a moon. Its gravity is about twice that of the Moon, so we need extra delta-v to land safely. We do get one huge benefit for free. By landing somewhere with an atmosphere, we can use heat shields and parachutes to slow our descent. This saves a lot of delta-v and reduces the fuel requirements for our landers.

Science landers involving samples will need a reserve of fuel to takeoff and return to the station. For now, we will skip the return trip to save on weight. Until we have a more sophisticated refueling option, fuel is a precious resource. We’re also sending relay satellites instead of tourism landers. Ferrying tourists will have to wait. Besides, the landers are no good if they can’t communicate their findings back to home base.

With our station assembled and all its support craft docked, we’re ready to plan an escape orbit! We could simply burn prograde to accelerate out of Kerbin’s gravity, but this would need a lot of fuel. Instead, we rely on the moon to give us a gravity assist. By flying close to the moon’s surface, we take advantage of the moon’s gravity to accelerate us away from the planet.

It works like this. If we encounter the moon on the leading side, in its direct path, its gravity will slow us down. If we find ourselves on the trailing side, in its wake, we will slingshot around it and gain enough speed to escape planetary orbit.

Now that we’re on a solar orbit, outside of Kerbin’s gravitational influence, we can chart a course to Duna. Unfortunately for us, we have chosen our launch timing poorly. We must wait nearly 400 days before our Duna intercept. Clearly, we’ve glossed over the details about planning to sustain a crew for 2yrs until the next resupply mission can be expected to arrive. In the real world, people need to eat.

As we approach the planetary encounter, the station prepares to perform a retrograde burn to settle into a circular orbit. After assessing our fuel status, we determine we have sufficient fuel to deploy our relays before descending into our final orbit to deploy surface landers.

Now that we have stations spreading throughout the system, we need a sustainable way to harvest fuel in space. After watching time lapse video of refueling missions, maybe you’ve started to appreciate the value of finding fuel sources in deep space. In our next episode, we intercept an asteroid and begin to harvest its resources!

And thanks for watching Kerbalism!

Stations Part 2, Lunar Orbit

Vimeo: https://vimeo.com/309137882

YouTube: https://youtu.be/YZj6RmCgXJ8

Welcome to Kerbalism! I’m your host Aubrey Goodman. In this episode, we deploy orbital stations to our moons.

In our quest to explore our solar system, we seek new information to help us make sense of the universe, to expand our understanding of physics. Having a manned station in orbit around a moon helps pave the way toward increased traffic to the moon and acts as a support point for missions to its surface.

Just as we did for planetary stations, we first send an unmanned fuel pod into low lunar orbit. This will help prepare for future missions. Deploying a manned science station at the same altitude but on the opposite side of the orbit helps increase utility. The fuel pod acts as a last ditch option for crafts running critically low on fuel. Having both stations on the same orbit at opposite ends effectively doubles the chance a struggling craft can dock with a station.

Orbital science stations act as a staging point for science missions to the surface. We want to make sure we have docking ports of all sizes on these stations, again to maximize utility. Also, since this station will be supporting other smaller craft, it needs a large cache of fuel, monopropellant, and electricity.

After the station is assembled in planetary orbit, with all its supporting craft docked, we’re ready for transfer orbit. With fuel reserves adequately filled, we plan and execute our lunar transfer maneuvers. This means a prograde maneuver from planetary orbit and a retrograde maneuver to settle into a low circular orbit around the moon.

From here, we can send our unmanned support craft to the surface to explore and gather samples. We can also ferry tourists to the surface for a space selfie. Tourism helps generate revenue to stoke the financial furnace to pay for our science missions.

We’ve spent a considerable amount of resources just to deploy stations to our moons. It’s going to take a lot more funding to build and deploy manned stations to other planets. In our next episode, we send a manned station to Duna, which is a lot like Mars. Don’t miss it!

And thanks for watching Kerbalism!

Satellites Part 3: Deploying to Solar Orbit

Vimeo: https://vimeo.com/308309765

YouTube: https://youtu.be/xpVvTuxP1XA

Welcome to Kerbalism! I’m your host, Aubrey Goodman. In this episode, we deploy two relays to solar orbit to become the backbone of our solar system communications relay network.

Before we can expand our horizons to visit other planets in the solar system, we need to have some infrastructure. Satellites sent to moons only need to communicate back to their planetary base. If we sent a satellite to another planet, we would need to make sure it has a very powerful radio to reach our home base. Also, as planets move around the solar system, the distance between them changes. In some situations, planets might find themselves on opposite sides of the star.

If we introduce a relay network in solar orbit, we can support a wider range of missions. Kerbin orbits around its star at 13.6 million kilometers. By placing a pair of relays in solar orbit at 8 million kilometers, the relays themselves are never more than 16 million kilometers apart, nor more than 16 million kilometers from Kerbin. This way, anything within range of a relay will be able to communicate with home base.

For orbital missions, such as placing satellites in orbit of other planets in the system, having a solar relay network is vital to maintaining connection with your probes. This will reduce payload antenna requirements and thus reduce costs, enabling more missions over time.

Observant viewers will note the two-node approach suffers the problem of having the star directly in the line-of-sight path between the relays. Using a three-node approach would eliminate the line-of-sight problem, at the cost of one extra relay. Also, positioning the relay itself is a very slow process, and making adjustments along the way would use too much fuel. Like so many things in space, it’s important to get it right the first time.

In this case, we settle for having two relays in circular solar orbits, and not quite exactly opposite each other. This gives us coverage for missions to all inner planets. The natural evolution of our relay network is to send smaller relays to each planet. This enables reduced cost missions with smaller radio equipment. If the probe only needs to communicate with the nearest relay network node, we can use the same equipment we used for lunar satellites.

So that’s all for relays. Now that we have the basis of our relay network, we can begin to discover more things about our solar system. One way we do that is by building stations in orbit. So, in our next episode, we’ll discuss orbital stations around our planet. Stay tuned!

And thanks for watching Kerbalism!

Satellites Part 2: Lunar Orbit

Vimeo: https://vimeo.com/307753956

YouTube: https://youtu.be/qCvHz1n0qxU

Welcome to Kerbalism. I’m your host, Aubrey Goodman. In this episode, we’ll review the deployment of satellites to lunar orbit.

First, let’s expand to consider the nearest moon. It requires more deltaV to get there, and more still to stabilize in a circular orbit. The good news is our Kerbin orbital satellite is over designed for its task. Its first stage does almost all the work, and we have plenty of fuel left over in the second stage for transfer orbit burns.

Once the craft is in planetary orbit, we need to perform two maneuvers to stabilize into orbit around Mun. If we do a really good job executing the maneuvers, we will settle into a circular orbit.

Orbital transfer between Kerbin and Mun can be done really at any time from a mostly equatorial orbit. This refers to the inclination of the orbital plane relative to the rotation of the body. Kerbin and Mun have very similar inclination, making it convenient to transfer between them. As we’ll find later, Kerbin’s other moon, Minmus, has a different inclination.

While a transfer can be made between Kerbin and Mun at any time, there are optimal points along the orbit where fuel use can be minimized, due to favorable alignment. Sometimes, we can save a huge amount of fuel simply by waiting for 20-30 mins.

Once we find a transfer orbit we like, with a destination periapsis at the desired altitude – that means the periapsis of the resulting orbit around Mun – once we find that periapsis, we can proceed with executing the maneuver at the appropriate time. Even perfect execution will result in slight misalignment with your designed objective. This is expected. If necessary, you can make corrections with RCS, but this is generally not required.

Now, after some time has passed your craft has traversed its path and is now approaching the periapsis of the destination orbit. You must burn retrograde until you slow down enough to stabilize into an elliptical orbit. Then, bring the apoapsis down to around the same altitude as the periapsis, resulting in a circular orbit.

Kerbin has a second moon, called Minmus. Its orbital inclination is about 6 degrees higher than Kerbin, so any craft headed there must also perform a maneuver to align its inclination. This is ideally done during orbital ascent, which reduces the inclination difference.

Our over designed satellite has enough fuel to enter stable orbits of both moons. But it also does very little. As we add capability to our satellite, the payload mass increases, and the first stage fuel requirements increase exponentially.

So that’s it for lunar satellites. In the next episode, we’ll focus on solar satellites; that is, satellites on an orbit similar to a planet. Those will lead us to a place where we will be able to establish a relay network of satellites that allows us to explore a wider part of the solar system. So stay tuned for that and much more!

And thanks for watching Kerbalism!

Satellites, Part 1: Deploying to Low Orbit

Vimeo: https://vimeo.com/307509709

YouTube: https://youtu.be/ZcPy605hAiM

Welcome to Kerbalism! I’m your host, Aubrey Goodman. In this episode, we’ll review the basics of deploying a satellite to low orbit. Let’s get started!

Long before we think about sending people into orbit, we need to send smaller unmanned probes. These serve as opportunities to learn about the perilous environment of low orbit. As we’ll show, they also present a solution to the issue of communication within the solar system. Without relays to boost the signal back to the origin planet, probes must carry heavy radio hardware powerful enough to reach home. Heavy things cost more to send to orbit. Lowering the cost is often a matter of reducing payload mass or using fuel more efficiently. There are many things to consider, even when designing a simple satellite deployment mission.

First, let’s look at the simplest case, deploying to planetary orbit. Here, we use Kerbin as our planet. It is similar to Earth, so it works very well as a learning and planning tool.

The simplest form of an orbital launch vehicle is a single stage configuration. This means the entire vehicle is one single unit ready to fly to orbit, from takeoff through ascent to low orbit. This is both inefficient and expensive for a satellite. There’s really no reason for the heavy lift stage to remain in orbit once the satellite has reached its intended orbit.

Rather than hauling heavy engines and fuel tanks into orbit to live forever awkwardly attached to our satellite, we will consider a more popular two stage configuration. In this case, we use a solid rocket first stage and a liquid second stage for orbital stabilization and precision maneuvering.

Using a solid rocket first stage has some side effects. The most important is they burn until the fuel is gone. There is no in-flight throttle control. Throttle can be achieved by narrowing the nozzle geometry, but this is a design-time decision and significantly impacts the construction cost.

Using a liquid first stage, we would be able to cut throttle on the ascent, and throttle back up at the peak of ascent to circularize the orbit for payload deployment. Then, if we’ve done well, we can burn retrograde to return the first stage back to the surface.

Terms & Concepts

Vimeo: https://vimeo.com/309674273

YouTube: https://youtu.be/pAcyaTRn_JM

Welcome to Kerbalism! I’m your host, Aubrey Goodman. Space is strange and foreign. There are lots of terms and concepts you probably haven’t heard before. We will use this terminology throughout the show, so let’s review the basics!

First, you blast off straight upward until your orbit reaches the desired altitude. The point with highest altitude along your orbit is called the apoapsis. Accelerating upward will raise your apoapsis. This is called a prograde burn; prograde means adding energy to the vehicle. When the craft reaches the apoapsis, we initiate a second maneuver (also a prograde burn) to accelerate sideways and increase our speed.

This raises the periapsis, or point with lowest altitude, up to the same altitude as the apoapsis, resulting in a circular orbit. In a circular orbit, the craft’s velocity doesn’t change very much. If we are orbiting a body outside of its atmosphere, there are no forces to accelerate the craft. This is referred to as a stable orbit.

If we wanted to land from a circular orbit, we would need to slow down, performing a retrograde burn. Retrograde means removing energy from the vehicle. Wherever we are along a circular orbit, burning retrograde will cause the apoapsis to settle at the craft’s location while the periapsis descends toward the planet’s surface on the opposite side of the orbit.

As the craft descends, its velocity increases. To be clear, we slow down now to speed up later at a lower altitude. If the periapsis is inside the atmosphere, we will begin to lose energy to drag forces. As we drop lower into the atmosphere, drag increases and vehicle speed decreases.

If instead we wanted to visit a moon orbiting the planet, we would need to burn prograde to speed up and raise the apoapsis to a higher altitude. This has the opposite effect as before. As the craft ascends, its velocity decreases. This time, we speed up now to slow down later at a higher altitude.

Each of these maneuvers is introducing a change in velocity, known as delta-v. As we compare different aspects of spacecraft design, we will be focused on optimizing delta-v. Many of the tools we use include automatic calculations for delta-v.

At this point, you might feel confused. In an elliptical orbit, the velocity changes along the path, so isn’t that the same as delta-v? Well, not exactly. As the craft moves around the ellipse, it speeds up toward the low point (or periapsis) and slows down toward the high point (or apoapsis). Each time the craft travels around the path, it returns to the periapsis with the same speed as it had the last time. Unless there is some other influence acting on the craft, it must obey the laws of physics and mathematics.

That’s all for this quick review. Stay tuned for satellite deployment!

And thanks for watching Kerbalism!